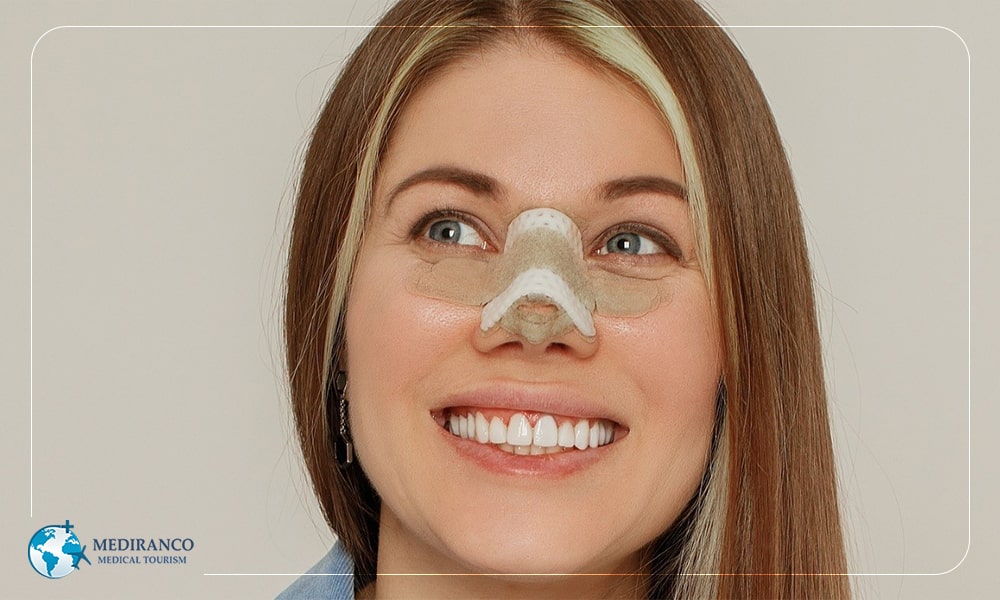
Congratulations on successfully undergoing rhinoplasty, a transformative journey towards achieving your desired nasal aesthetics and functionality! As you embark on the path to complete healing and optimal results, it is essential to prioritize post-operative care. One crucial aspect of this care is nose taping, a technique that can significantly impact your recovery process.
In this comprehensive guide, we will walk you through the importance of nose taping after rhinoplasty and provide you with step-by-step instructions to ensure you apply it correctly. Additionally, we will discuss essential dos and don’ts to help you navigate the recovery journey safely and with confidence.
Understanding the significance of nose taping and learning the proper techniques will empower you to actively participate in your healing process, maximize surgical outcomes, and embrace the beautiful transformation that lies ahead. Let’s dive into the world of nose taping and discover how this simple yet powerful method can make a substantial difference in your post-rhinoplasty experience.
Table of Contents
ToggleIn this article we will discuss:
- Nose taping benefits – Importance of Nose Taping after Rhinoplasty
- 2. Step-by-Step Guide: How to Properly Tape Your Nose for Optimal Healing
- 3. Dos and Don’ts of Nose Taping: Tips for Safe and Effective Recovery
Nose taping benefits – Importance of nose taping after rhinoplasty
Nose taping is a crucial part of the post-operative care after undergoing rhinoplasty. This simple yet effective technique plays a significant role in supporting the healing process and ensuring optimal results from the surgery. Understanding why nose taping is essential can help you appreciate its benefits and follow the post-operative care instructions more diligently.
a) Reduces swelling and bruising:
After rhinoplasty, swelling and bruising are common side effects that can be uncomfortable and affect your appearance. Nose taping helps to compress the tissues gently, minimizing the accumulation of fluid and reducing swelling. It also aids in preventing excessive bruising by providing additional support to delicate blood vessels during the initial healing phase.
b) Supports nasal structure:
During rhinoplasty, the nasal bones and cartilage are carefully reshaped to achieve the desired aesthetic and functional outcome. Nose taping helps to maintain the new shape by holding the nasal structures in place during the early healing stages. This support is crucial as the nasal tissues are more vulnerable to external forces during this period.
c) Promotes proper scar healing:
Rhinoplasty involves incisions, and proper healing of these incision sites is essential for minimizing visible scarring. Nose taping can help keep the incisions closed and protect them from irritation, ensuring a smoother and less noticeable scar over time.
d) Assists in breathing and airflow:
Maintaining a clear nasal passage is essential for proper breathing after rhinoplasty. Nose taping can aid in keeping the airway open and preventing nasal obstruction, which may occur due to swelling or altered nasal anatomy during the healing process.
e) Enhances surgical results:
Following the surgeon’s post-operative instructions, including nose taping, can contribute to improved surgical outcomes. By properly caring for your nose after rhinoplasty, you increase the chances of achieving the desired cosmetic changes and functional improvements intended by the surgery.
Step-by-step guide: How to tape nose after rhinoplasty.

How to Properly Tape Your Nose for Optimal Healing? Proper nose taping is crucial to ensure effective healing and support after rhinoplasty. Follow this step-by-step guide to learn the correct technique for applying and removing nose tape:
Step 1: Gather Supplies
Ensure you have all the necessary supplies before you begin. You’ll need medical-grade tape, which is hypoallergenic and safe for use on the delicate skin of your nose. Your surgeon or their team will likely provide you with the appropriate tape. You may also need some sterile gauze or cotton pads to place on your nose before applying the tape for added comfort.
Step 2: Wash Your Hands
Always start by washing your hands thoroughly to minimize the risk of infection during the taping process.
Step 3: Prepare the Nose
Gently clean the area around your nose with a mild, non-alcoholic cleanser recommended by your surgeon. Pat the skin dry with a clean towel or allow it to air dry.
Step 4: Apply Sterile Gauze or Cotton Pads (If Necessary)
If your surgeon advises, place a small piece of sterile gauze or cotton pads on the incision sites or areas of the nose that require additional protection. This can provide a cushioning effect and prevent the tape from sticking directly to the incisions.
Step 5: Cut the Tape
Carefully cut the medical-grade tape into pieces of appropriate length. Your surgeon may guide you on the ideal size and shape of the tape strips.
Step 6: Begin Taping
Start by applying the tape to the bridge of your nose. Gently pull the skin upward while placing the tape, as this can help maintain the desired shape and provide added support to the nasal structure. Avoid pulling the tape too tightly, as it may cause discomfort or interfere with proper blood circulation.
Step 7: Follow Your Surgeon’s Instructions for nose taping
Your surgeon will provide specific guidelines on how long you should keep the tape on each day and how frequently you should change it. Typically, nose taping is required for several weeks after rhinoplasty, but the duration may vary depending on individual healing progress and the surgeon’s preferences.
Step 8: Removing the Tape
When it’s time to remove the tape, do so gently and with care. To minimize discomfort, you can use a cotton ball soaked in warm water or a recommended adhesive remover to loosen the tape before peeling it off. Avoid pulling the tape abruptly, as it may irritate the healing skin.
Remember to keep your surgeon informed of any concerns or issues you experience during the taping process. Proper nose taping, along with following all post-operative care instructions, will contribute significantly to a successful and smooth recovery after rhinoplasty.
Dos and don’ts of nose taping: Tips for safe and effective Recovery
While nose taping can be beneficial for post-rhinoplasty healing, it’s essential to follow certain dos and don’ts to ensure a safe and successful recovery. Here are some important tips to keep in mind:
Dos of nose taping:
1. Follow Your Surgeon’s Instructions: Your surgeon at Mediranco knows your specific case best and will provide personalized guidelines for nose taping. Follow their instructions diligently, including the recommended duration and frequency of taping sessions.
2. Keep the Nose Clean and Dry: Ensure the skin around your nose remains clean and dry during the healing process. Gently cleanse the area as advised by your surgeon, and avoid excessive moisture or prolonged exposure to water, as it may weaken the tape’s adhesive.
3. Use Hypoallergenic Tape: Opt for medical-grade, hypoallergenic tape to minimize the risk of skin irritation or allergic reactions. Inform your surgeon if you have a history of skin sensitivity to adhesive products.
4. Apply Gentle Pressure: When taping your nose, exert gentle pressure to support the nasal structure without causing discomfort or restricting blood flow. The tape should feel secure but not overly tight.
5. Observe for Any Irritation or Redness: Regularly check the skin under the tape for signs of irritation, redness, or any adverse reactions. If you notice any concerning changes, contact your surgeon for further guidance.
6. Take Breaks if Advised: Some surgeons may recommend short breaks from nose taping during the healing process. If instructed to do so, follow the schedule to give your skin some rest and prevent potential irritation.
Don’ts of nose taping:
1. Don’t Remove the Tape Prematurely: Avoid removing the nose tape earlier than instructed by your surgeon. Premature removal can compromise the healing process and result in suboptimal outcomes.
2. Avoid DIY Techniques: Stick to the taping method recommended by your surgeon or their team. Avoid experimenting with DIY taping techniques found online, as they may not be suitable for your unique case.
3. Don’t Apply Excessive Force: Refrain from pulling or tugging on the tape forcefully, as it can cause skin irritation and negatively impact your recovery.
4. Avoid Submerging the Nose in Water: Until your surgeon gives the green light, avoid activities that involve submerging your nose in water, such as swimming or taking baths, as it may weaken the tape’s adhesive.
5. Don’t Reuse Tape: For hygiene and efficacy reasons, use fresh pieces of tape each time you reapply after removal. Reusing tape can compromise its adhesive properties.
6. Avoid Picking at the Tape: Refrain from picking, scratching, or adjusting the tape excessively. Doing so may disturb the healing tissues and increase the risk of infection.
By adhering to these dos and don’ts, you can optimize your nose taping experience and contribute to a smooth and successful recovery following rhinoplasty. Always communicate with your surgeon at health tourism company Mediranco if you have any concerns or questions during the healing process.

Rhinoplasty cost in Iran
We At Mediranco, a health tourism company in Iran, provide a range of services to help you enhance your appearance and boost your self-confidence. Our prices for rhinoplasty, revision rhinoplasty , and septoplasty are competitive and affordable, rhinoplasty cost in Iran starts from $1630.

